반응형
지난 글에서는 Rest API가 무엇인지? 우리가 Rest API로 알고 사용했던 것이 RestAPI가 아니었고 HttpAPI 였다는 것을 정리하였습니다.
이번 글에서는 Rest API를 직접 구현해보겠습니다.
모든 소스는 github에 올려두었습니다.

개발자는 소스로 대화하고 설명하는 것이 가장 쉽다!
build.gradle
최소 아래와 같은 의존성을 추가해줍니다.
dependencies {
	implementation 'org.springframework.boot:spring-boot-starter-web'
	implementation 'org.springframework.boot:spring-boot-starter-hateoas'

	compileOnly 'org.projectlombok:lombok'
	annotationProcessor 'org.projectlombok:lombok'
	testImplementation 'org.springframework.boot:spring-boot-starter-test'
}
Entity
RobotEntity를 생성합니다.
@Getter
@Setter
@NoArgsConstructor
@AllArgsConstructor
@ToString
@EqualsAndHashCode(of = {"id"})
@Builder
public class Robot {
    private Long id;
    private String name;
    private Integer age;
}
Controller
RobotController를 작성합니다.
@RestController
@RequestMapping(value = "/api/robots", produces = MediaTypes.HAL_JSON_VALUE)
public class RobotController {
    private RobotService robotService;

    public RobotController(RobotService robotService) {
        this.robotService = robotService;
    }

    @PostMapping
    public ResponseEntity createRobot(@RequestBody Robot robot) {
        Robot newRobot = robotService.createRobot(robot);
        WebMvcLinkBuilder builder = linkTo(RobotController.class);
        URI uri = builder.toUri();

        // HAL
        EntityModel<Robot> entityModel = EntityModel.of(newRobot);
        entityModel.add(linkTo(RobotController.class).withSelfRel());
        entityModel.add(linkTo(RobotController.class).slash(newRobot.getId()).withRel("detail"));

        return ResponseEntity.created(uri).body(entityModel);
    }

    @PutMapping
    public ResponseEntity updateRobot(@RequestBody Robot robot) {
        Robot updateRobot = robotService.updateRobot(robot);

        // HAL
        EntityModel<Robot> entityModel = EntityModel.of(updateRobot);
        entityModel.add(linkTo(RobotController.class).withSelfRel());
        entityModel.add(linkTo(RobotController.class).slash(updateRobot.getId()).withRel("detail"));

        return ResponseEntity.ok(entityModel);
    }

    @GetMapping(value = "/{robotId}")
    public ResponseEntity robotDetail(@PathVariable(value = "robotId") final Long robotId) {
        Robot robot = robotService.findById(robotId);

        // HAL
        EntityModel<Robot> entityModel = EntityModel.of(robot);
        entityModel.add(linkTo(RobotController.class).slash(robotId).withSelfRel());
        entityModel.add(linkTo(RobotController.class).withRel("create"));
        return ResponseEntity.ok(entityModel);
    }
}
모바일 분들을 위해서 간단하게 설명드리겠습니다.
Controller의 MediaType을 HAL+JSON 타입으로 설정합니다.
Post, Put, Get 타입으로 생성, 수정, 조회 Rest API를 생성합니다.
각 메서드에 HAL을 적용시켜 return합니다.
Hateoas에서 제공하는 EntityModel을 사용하여 Hateoas 객체를 생성합니다.
linkTo(Class class) 메서드를 사용하면 class의 URI를 가져올 수 있습니다. 거기에 slash를 사용하면 뜻 그대로 "/"를 붙히는 방식으로 작성할 수 있습니다.
withSelfRel() 메서드는 hyperlink 정보에 self 즉 자기 자신 URI 정보라고 명시해주는 것입니다.
withRel() 메서드는 hyperlink 정보에 명시하고 싶은 값을 작성할 수 있습니다.
Test
생성한 Controller가 정상적으로 결과값을 반환하는지 확인합니다.
@ExtendWith(SpringExtension.class)
@SpringBootTest
@AutoConfigureMockMvc
class RobotControllerTest {

    @Autowired
    MockMvc mockMvc;

    @Autowired
    ObjectMapper objectMapper;

    @Test
    public void createRobot_Success_Test() throws Exception {
        Robot robot = Robot.builder()
                .id(1L)
                .age(132)
                .name("RobotV")
                .build();

        mockMvc.perform(post("/api/robots")
                    .contentType(MediaType.APPLICATION_JSON_UTF8)
                    .accept(MediaTypes.HAL_JSON)
                    .content(objectMapper.writeValueAsString(robot)))
                .andDo(print())
                .andExpect(status().isCreated())
                .andExpect(jsonPath("id").exists())
                .andExpect(jsonPath("age").exists())
                .andExpect(jsonPath("name").exists());
    }
}
MockMvc를 이용하여 테스트합니다.
contentType은 Application json utf8로 설정합니다.
accept는 HAL+JSON으로 설정합니다.
위 테스트 코드를 실행하면 정상적으로 작동합니다.
사용
client로 Restlet을 사용해서 테스트해보겠습니다
postman을 사용해도 무관합니다
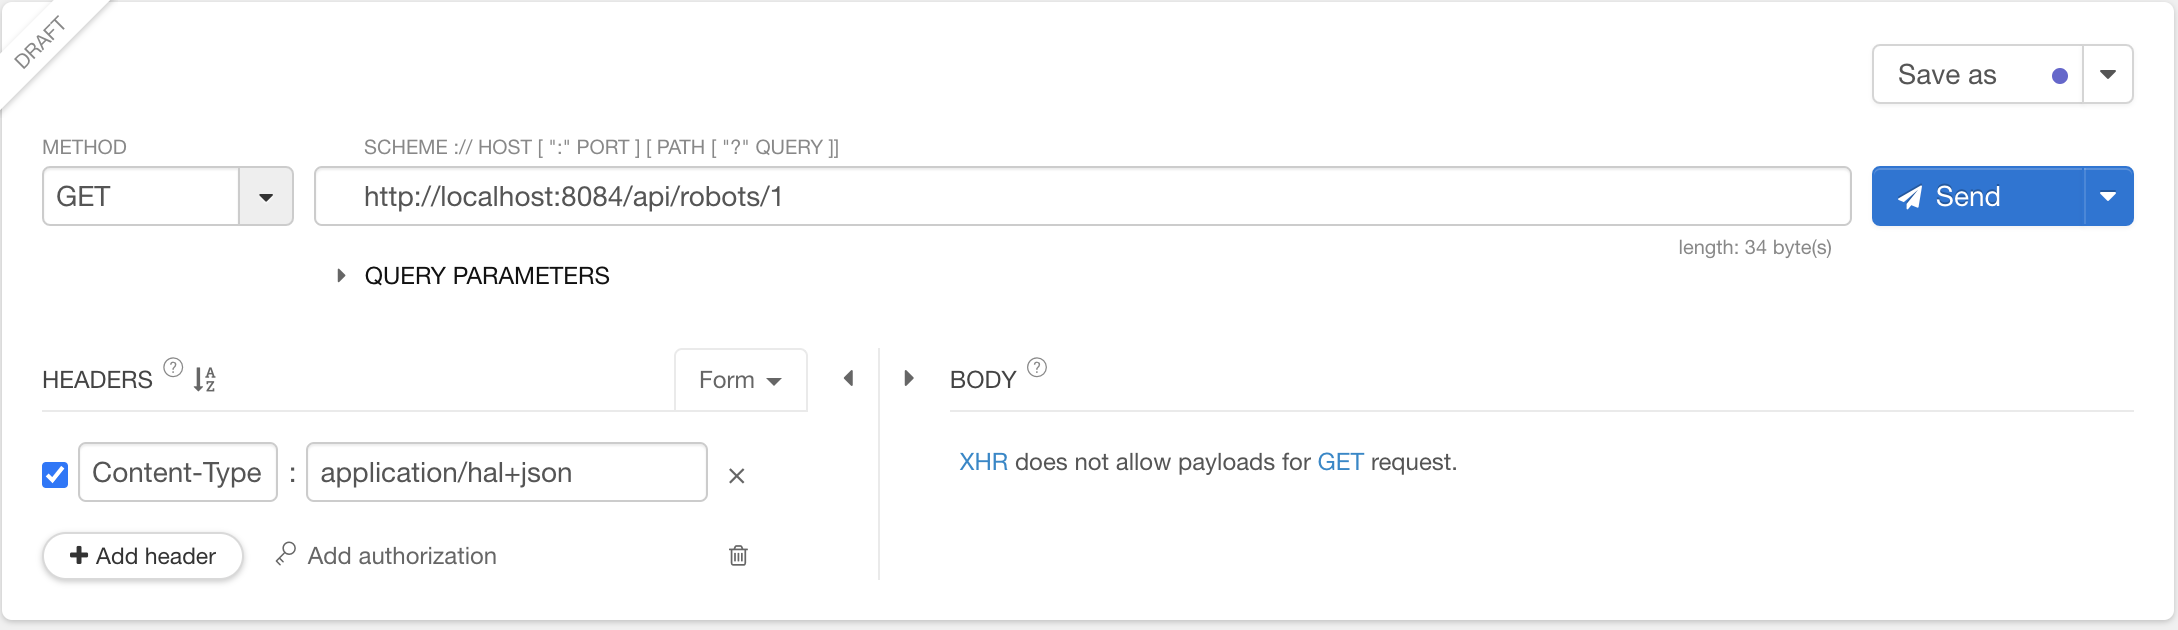
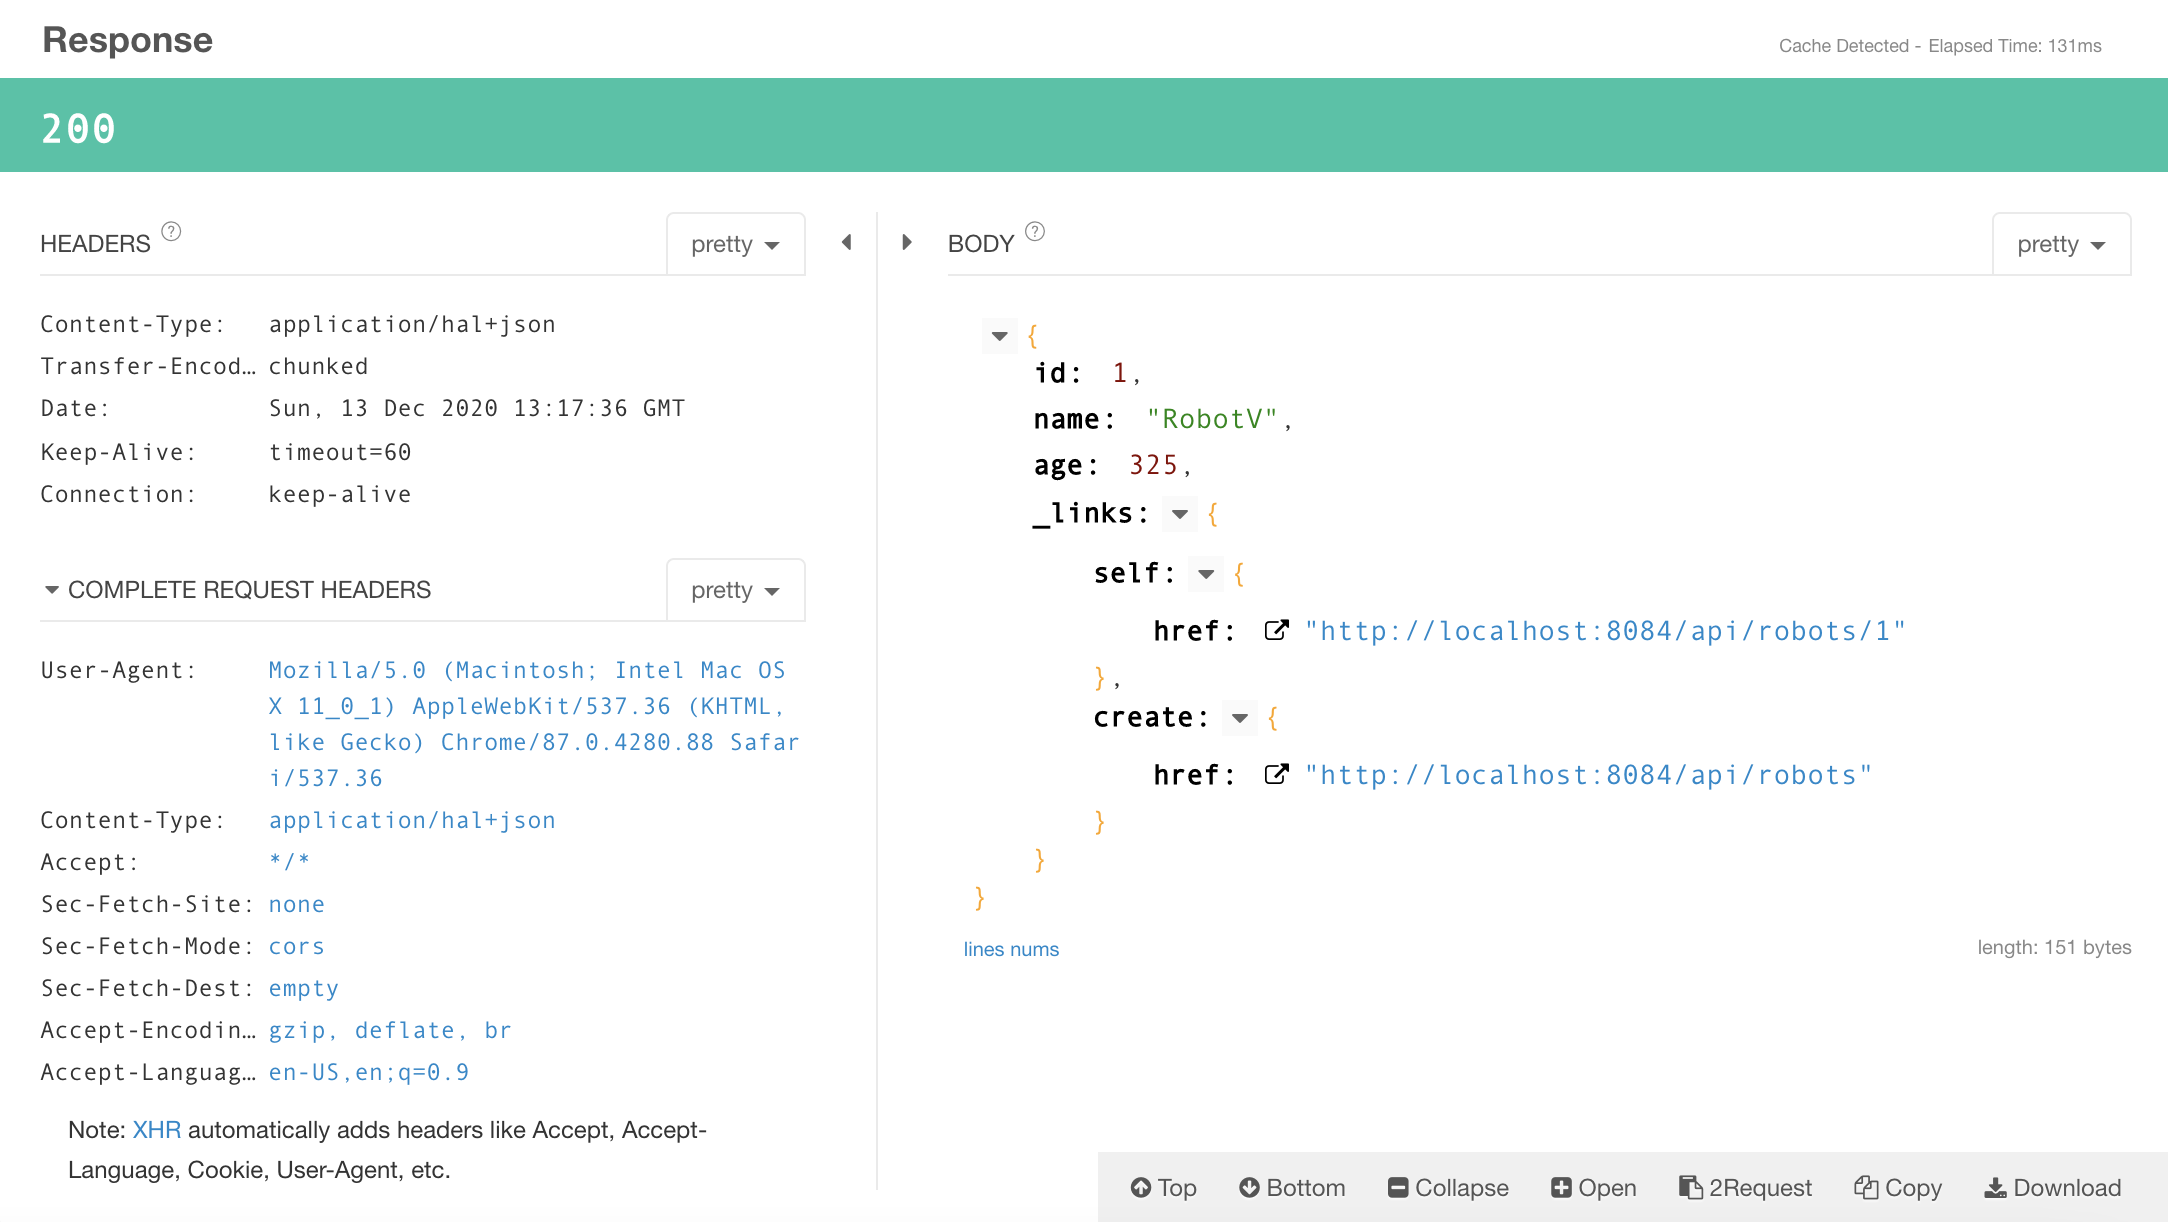
이처럼 hyperlink 값이 정상적으로 출력되는 것을 확인할 수 있습니다.
결론
- 이렇게 Rest API를 사용한다면 독립적으로 진화가 가능하게 될 것입니다.
- Client에서 사용할 hyperlink는 동적으로 변경되기 때문에 URI에 version을 명시할 필요도 없어지고 URI가 바껴도 Client에서는 수정할 필요가 없어집니다. 그래서 독립적으로 진화가 가능합니다.
- 무조건 적용할 필요는 없다고 합니다.
- 더 이상 진화할 필요가 없으면 적용할 필요가 없겠죠?
반응형
'Study > spring' 카테고리의 다른 글
| @Autowired vs @Inject vs @Resource (4) | 2021.02.18 |
|---|---|
| Rest API란? (0) | 2020.12.16 |
| Spring Triangle [IoC, AOP, PSA] - 3탄 PSA편 (0) | 2020.12.15 |
| Spring Triangle [IoC, AOP, PSA] - 2탄 AOP편 (0) | 2020.12.14 |
| Spring Triangle [IoC, AOP, PSA] - 1편 IOC편 (0) | 2020.12.13 |